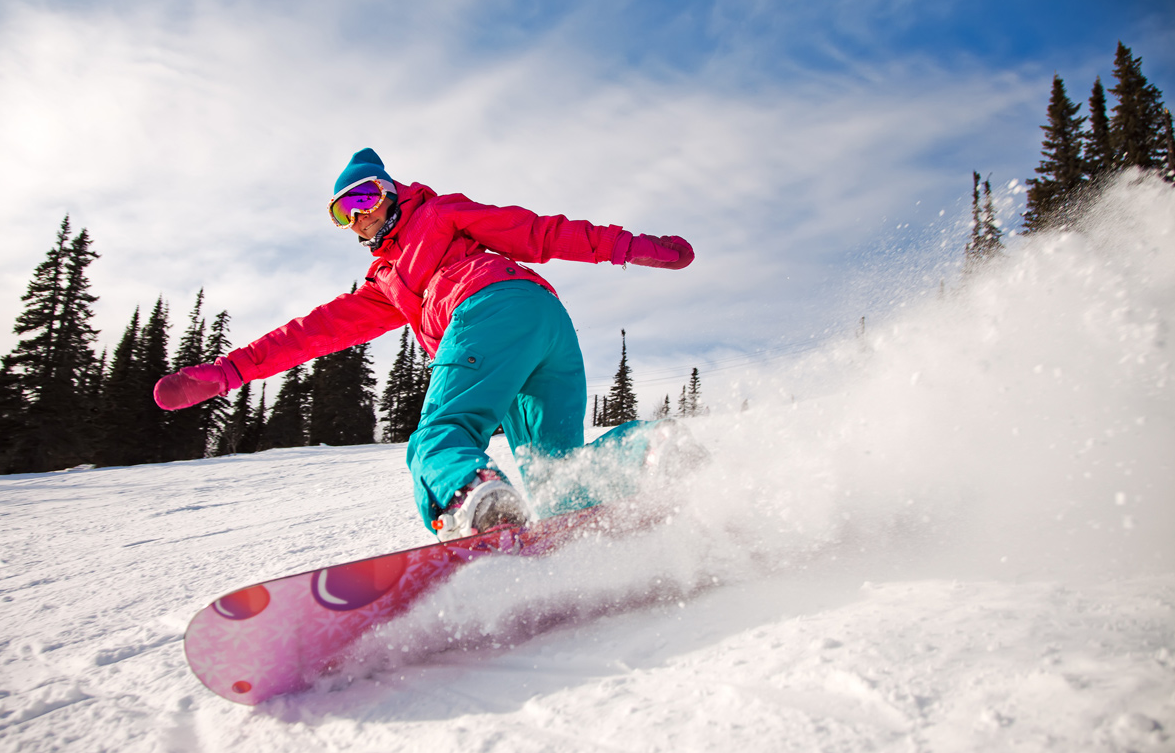
Snowboarding combines balance, edge control, and body positioning to navigate snow-covered terrain. The first few days can be challenging. Even experienced skiers often find that standing sideways on a single board demands a different approach to balance and movement.
Learning is easier when you tackle the fundamentals in the right order. Before attempting linked turns or steeper runs, beginners need to understand their equipment, establish a comfortable stance, and learn to regulate speed using the snowboard’s edges.
This guide covers essential equipment, snowboard selection, fundamental riding techniques, and a step-by-step learning progression. It also addresses common mistakes and safety practices that help new riders develop confidence on the mountain.
What Is Snowboarding?
Snowboarding is a winter sport in which riders descend snow-covered slopes while standing sideways on a single board. Both feet are secured through bindings, allowing the rider to steer, turn, and brake by adjusting edge angles, body position, and pressure distribution.
Unlike skiing, where each foot controls a separate ski, snowboarding requires both legs to work together on one platform. This affects how riders maintain balance, initiate turns, and recover from mistakes.
Snowboarding includes several disciplines:
- Freeriding: Exploring natural terrain, including ungroomed slopes and powder snow.
- Freestyle: Performing jumps, tricks, and maneuvers in terrain parks or on natural features.
- All-mountain: Riding different types of resort terrain with versatile equipment.
- Alpine snowboarding: Making precise carved turns on groomed slopes, often using specialized boards and hard boots.
For beginners, gentle groomed runs provide the best environment for developing basic skills. They offer predictable conditions without the added challenges of deep snow, steep gradients, or terrain park features.
Good technique and regular practice matter more than trying to force the board through each movement. A suitable learning environment also gives riders time to recognize mistakes and make corrections.
Essential Snowboarding Equipment for Beginners
Well-matched equipment makes learning more comfortable and helps riders control their movements. Expensive gear is unnecessary at first, but the snowboard, boots, and bindings must fit properly and work together.
Snowboard
A beginner-friendly snowboard should be manageable at low speeds and forgiving of minor technique errors.
Soft or medium-soft all-mountain boards are common starting choices. Their flexibility makes them relatively easy to maneuver, although the appropriate flex also depends on rider weight and board construction.
Directional twin and true twin shapes are both suitable for learning. A true twin has a symmetrical shape and flex pattern designed for riding in either direction. A directional twin typically has a twin-like shape with some directional characteristics, making it versatile for general resort riding.
Snowboard Boots
Properly fitted boots are essential for transferring movements to the snowboard.
The heel should remain secure without excessive lifting, and the toes may lightly touch the front of the boot when standing upright. When the knees bend into a riding stance, the toes should have enough room to avoid uncomfortable pressure.
Loose boots reduce responsiveness, while excessively tight boots can cause pain, numbness, and circulation problems.
Beginners often prefer soft or medium-soft boots because they provide comfortable ankle mobility without sacrificing the support needed for basic edge control.
Bindings
Bindings secure the boots to the snowboard and transfer pressure from the rider’s feet to the board.
Traditional strap-in bindings use ankle and toe straps. Rear-entry and step-in or step-on systems are also available, although compatibility requirements vary by design.
Binding size must match the boots. An improper fit can create pressure points, unwanted movement, or inadequate support. Boots should sit securely without excessive overhang or interference with the binding components.
Protective Equipment and Clothing
A properly fitted snow-sports helmet is essential. Look for a helmet certified to a recognized standard, such as ASTM F2040 or EN 1077. It should sit securely without shifting when the head moves.
Other useful equipment includes:
- Goggles: Protect against wind, snow, glare, and changing visibility.
- Waterproof jacket and pants: Keep outer moisture away from insulating layers.
- Gloves or mittens: Protect hands from cold and repeated snow contact.
- Wrist guards: May reduce the risk of certain wrist injuries during falls.
- Impact shorts: Add padding around the hips and tailbone.
- Snowboard socks: Help manage moisture and reduce friction inside boots.
Layered clothing offers more flexibility than one heavy garment. A moisture-wicking base layer, appropriate insulation, and a weather-resistant shell allow riders to adjust to changing conditions.
How to Choose a Snowboard and Set Up Your Stance
Snowboard selection depends on body weight, boot size, board construction, and intended terrain. Length alone does not determine whether a board is suitable.
Choosing the Right Snowboard Size
Manufacturers provide recommended weight ranges for individual snowboard models. These are more reliable than the traditional chin-to-nose sizing method.
A board that is too short or too soft for the rider’s weight may feel less supportive and harder to control, while an excessively long or stiff board can make low-speed turns more demanding.
Width also matters. Excessive boot overhang can cause the toes or heels to drag in the snow during turns. A board that is unnecessarily wide may feel slower when changing edges.
Beginners should consult manufacturer sizing charts and ask a rental technician or snowboard shop to check the fit.
Understanding Snowboard Profiles
The snowboard’s profile describes its lengthwise curvature when viewed from the side.
- Camber has an upward arch between the contact points when the board is unweighted. Traditional camber provides responsive edge engagement and strong grip, but some designs can be less forgiving of poorly timed movements.
- Rocker features an upward curvature that lifts portions of the board away from the snow. Rockered boards can feel easier to pivot at low speeds, although edge grip and stability vary with construction.
- Flat and hybrid profiles combine different design characteristics. Flat-to-rocker and other hybrid configurations are common on beginner-oriented boards because they can offer a balance between stability and maneuverability.
- Profile is only one factor. Flex, sidecut, length, and construction also determine how a snowboard responds.
Regular vs. Goofy Stance
Snowboarders ride with one foot closer to the nose of the board.
- Regular stance: Left foot forward.
- Goofy stance: Right foot forward.
Neither stance is inherently better. Some beginners immediately prefer one direction, while others need to experiment.
A person’s dominant hand or preferred kicking foot does not reliably predict their snowboard stance. Simple balance exercises and supervised practice can help identify the more comfortable position.
Binding Angles and Stance Width
Binding angles determine how the feet are positioned relative to the board.
A common beginner setup uses a positive front angle and a slightly negative rear angle. For example, +15° on the front binding and −6° on the rear can provide a comfortable starting point, although individual preferences differ.
Stance width should allow both knees to bend naturally without placing excessive strain on the hips. Approximately shoulder-width spacing is a useful initial reference.
A comfortable setup should allow the rider to distribute weight evenly, bend into an athletic stance, and move without discomfort.
Minor adjustments may improve comfort, but constantly changing binding settings makes it harder to develop consistent technique.
Basic Snowboarding Techniques
Snowboarding starts with three essentials: balance, edge control, and understanding how the board responds on a slope.
A snowboard has two long edges: the heel edge behind the rider’s heels and the toe edge in front of the toes. Tilting the board onto either edge allows the rider to grip the snow, steer through turns, and control speed.
The amount of edge pressure, the board’s direction, and its interaction with the snow determine how sharply it turns or slows down.
When the snowboard’s base lies flat against the snow, it generally slides more freely than when an edge is engaged. Learning to manage these transitions is essential.
Balance, Stance and Stopping
A stable riding position begins with slightly bent ankles, knees, and hips.
Keep the head upright, arms relaxed, and weight balanced over the board. Excessive bending at the waist or shifting too far backward makes edge control more difficult.
Beginners should practice standing, shifting pressure, and moving on flat snow before attempting downhill exercises.
Skating with one foot
Skating allows snowboarders to move through lift lines and across short flat sections.
Keep the front foot secured in its binding while the rear foot pushes against the snow. After pushing, place the free foot on the board between the bindings, preferably against a traction pad, and glide briefly.
Bent knees and looking in the direction of travel help maintain balance.
Heel-side sideslipping
Heel-side sideslipping is one of the first exercises used to develop controlled braking.
On a gentle slope, position the snowboard approximately across the hill while facing downhill. Engage the heel edge by lifting the toes slightly and maintaining pressure through the heels.
Gradually reducing the edge angle allows the board to slide downhill. Increasing heel-edge engagement slows the movement or brings the board to a stop.
Aim for a smooth, controlled slide rather than abruptly digging the edge into the snow.
Toe-side sideslipping
Toe-side sideslipping uses the opposite edge.
Face uphill with the snowboard positioned across the slope. Press the shins gently into the front of the boots while keeping the knees bent and the hips aligned over the board.
Reducing the toe-edge angle allows the board to slip downhill. Increasing engagement slows or stops the slide.
This position can initially feel unfamiliar because the rider cannot directly see the downhill terrain. Avoid bending excessively at the waist or leaning away from the board.
Falling and getting up
Falls are common during the early stages of learning.
Avoid bracing a fall with straight arms or locked wrists. Keep your limbs from extending rigidly and practice controlled falling techniques under an instructor’s supervision. Protective equipment may reduce certain injuries, but no technique eliminates the risk.
Getting up is often easier from a kneeling position with the toe edge engaged. Riders can also stand from a seated position while holding the heel edge across the slope.
Always check for approaching riders before standing.
Turning and Controlling Speed
Once stopping on both edges becomes reliable, beginners can start changing direction.
Turns involve coordinated movements through the ankles, knees, hips, and snowboard. Forcefully twisting the shoulders is not a substitute for proper edge control.
Falling leaf
The falling leaf exercise develops directional control without changing edges.
With the snowboard approximately across the slope, the rider travels diagonally in one direction, slows down, and then moves diagonally the other way.
Small adjustments in pressure and board orientation change the direction of travel.
Practice on both heel and toe edges before progressing to complete turns.
J-turns
A J-turn introduces the movement from a gentle downhill glide into a controlled stop.
On a gentle slope, begin with a short, controlled glide, allowing the board to point gradually downhill before engaging an edge to finish across the slope.
The snowboard follows a J-shaped path. Practicing on both edges helps riders understand how edge engagement and turn shape influence speed.
Linked turns
Linked turns connect heel-side and toe-side movements into a continuous descent.
As one turn finishes, gradually reduce pressure on the engaged edge. Allow the base to lie nearly flat against the snow for a brief moment before engaging the opposite edge to begin the next turn.
Timing is important. Engaging the new edge too early can cause an unexpected edge catch.
Beginners should start with wide, controlled turns before attempting tighter turns.
Speed control
Speed is managed primarily through turn shape, direction of travel, and edge engagement.
A snowboard pointing directly down the fall line generally accelerates faster than one traveling across the slope. Finishing turns farther across the hill helps reduce speed without sudden braking.
Sideslipping remains useful when a section is too narrow or steep for comfortable linked turns.
Never enter terrain where maintaining control or stopping safely is beyond your current ability.
How to Learn Snowboarding Step by Step
The most effective way to learn is to build one skill on top of another. Moving to difficult terrain too early often encourages defensive habits that make basic movements harder to control.
Step 1: Become Comfortable With the Equipment
Start on flat snow.
Practice fastening and releasing bindings, finding a balanced stance, and moving with one foot attached. Get familiar with how the board responds to pressure through the toes and heels.
Before progressing, you should be able to stand comfortably, skate short distances, and get up after a fall.
Step 2: Learn to Skate and Ride a Beginner Lift
Practice pushing with the free foot and gliding short distances.
Before using a lift, learn the loading and unloading procedures. When exiting a chairlift, snowboarders generally keep the front foot attached and place the free rear foot on the board for balance.
Ask an instructor or lift attendant which lifts provide access to gentle learning terrain. Beginners should avoid lifts that lead exclusively to runs beyond their ability.
Step 3: Control Both Edges
Move to a gentle beginner slope and practice sideslipping.
Work toward controlling downhill speed on either edge, stopping at a chosen point, and restarting without losing balance.
Progress once you can manage both edges without repeatedly losing control.
Step 4: Practice Traversing and Falling Leaf
Once sideslipping feels comfortable, begin moving diagonally across the slope.
Practice traversing in both directions while maintaining the same edge. Repeat on the opposite edge until you can change direction and regulate speed without abrupt movements.
Step 5: Introduce J-Turns
Practice J-turns on both edges until you can finish each movement balanced and stop without sitting down or catching an edge.
Use a gentle, open slope with enough space to complete the turn safely.
Step 6: Connect Turns on Easy Terrain
Begin by linking two or three controlled turns on a gentle slope.
Gradually extend the sequence while maintaining a comfortable speed and consistent rhythm. Avoid rushing the transition between edges.
Focus on completing each turn with control rather than trying to increase speed.
Step 7: Build Consistency Before Increasing Difficulty
Repeat familiar runs until stopping, turning, and adjusting speed require less conscious effort.
Then gradually introduce different snow conditions and slightly steeper terrain.
There is no fixed timeline for learning. Some beginners link turns during their first lessons, while others need several sessions. Previous board-sport experience, fitness, instruction, and snow conditions all influence progress.
Common Snowboarding Mistakes Beginners Make
Many beginner struggles come from the same handful of technical mistakes. Recognizing their effects makes it easier to identify what needs correcting.
Leaning backward
When the board accelerates, beginners sometimes shift their weight toward the rear foot. This reduces pressure and control at the front of the board, making turns harder to initiate.
A common sign is difficulty guiding the board into a turn despite considerable effort. Returning to a centered stance helps restore more balanced control.
Looking down at the snowboard
Watching the feet reduces awareness of terrain and approaching riders. It can also encourage an awkward posture.
If the rider repeatedly loses track of their intended line, focusing farther ahead can improve anticipation and balance.
Keeping the legs stiff
Locked knees limit the body’s ability to absorb uneven terrain and adjust edge pressure.
This often produces a rigid, unstable ride, especially when the snow surface changes. Relaxing the joints allows smoother adjustments.
Rotating the shoulders excessively
Swinging the shoulders forcefully can make the snowboard pivot unpredictably, especially when edge control is inconsistent.
A rider who repeatedly twists the upper body without completing a smooth turn should focus on coordinated movements through the lower body instead.
Catching an edge
An edge catch occurs when an unintended snowboard edge engages the snow unexpectedly, often causing the board to stop abruptly while the rider’s momentum continues.
Poorly timed edge changes are a common cause. Practicing gradual edge release and engagement on gentle terrain helps reduce the likelihood of this mistake.
Choosing difficult terrain too early
Steeper slopes increase speed and leave less time to react. Beginners may compensate by skidding aggressively, leaning backward, or repeatedly falling.
If basic turns become unreliable, returning to easier terrain allows the rider to regain control and refine technique.
Ignoring fatigue
Snowboarding requires concentration and physical effort, particularly when beginners spend much of their time recovering from falls.
Fatigue can reduce coordination and make edge changes less precise. Short breaks help maintain control and concentration throughout the session.
Snowboarding Safety Tips and Mountain Etiquette
Safe riding depends on suitable equipment, terrain awareness, and consideration for other slope users.
Wear a Helmet and Check Equipment
Fasten the helmet securely before riding.
Inspect binding straps, buckles, and mounting hardware for damage or looseness. Make sure both boots are properly secured before descending.
Some resorts require a snowboard leash or another approved retention system to prevent a detached board from sliding downhill. Follow local requirements and never leave an unsecured snowboard where it could slide away.
Choose Terrain Within Your Ability
Trail difficulty ratings vary between resorts and regions.
A beginner run at one mountain may be more demanding than a similarly marked trail elsewhere. Snow quality, visibility, grooming, and congestion also influence difficulty.
Stay on suitable marked runs, respect closures, and reassess conditions throughout the day.
Follow the Responsibility Code
Many North American ski areas follow the National Ski Areas Association’s Your Responsibility Code, which establishes basic expectations for safe conduct.
Important principles include maintaining control, avoiding people downhill, observing posted warnings, and checking uphill before starting or merging onto a trail.
Riders should also:
- Stop only where they remain visible and do not obstruct the trail.
- Give people downhill the right of way.
- Follow signs, closures, and resort staff instructions.
- Learn safe lift loading and unloading procedures.
- Avoid riding while impaired by alcohol or drugs.
Local resort regulations take precedence and should be reviewed before entering the slopes.
Understand Snow and Weather Conditions
Hard-packed or icy snow can make edge grip less predictable. Heavy, wet snow may require more effort to maneuver, while poor visibility makes it difficult to judge terrain and approaching obstacles.
Conditions can change throughout the day as temperatures, snowfall, wind, and slope traffic affect the surface.
Check mountain reports before riding and adjust your plans when conditions deteriorate.
Off-piste and backcountry areas introduce additional hazards, including avalanches, hidden obstacles, and limited rescue access. These environments require specialized knowledge, preparation, and equipment beyond beginner resort riding.
Consider Professional Instruction
A qualified instructor can assess stance, demonstrate edge control, and select exercises appropriate to the learner’s ability.
Group lessons offer a structured introduction and opportunities to practice alongside other beginners. Private lessons provide more individual feedback and may be useful for addressing specific technical difficulties.
Instruction cannot prevent every fall, but it can help beginners develop reliable movement patterns and avoid unnecessary trial and error.
FAQ
Is snowboarding hard for beginners?
Snowboarding can feel challenging at first because both feet are attached to one board and balance must be maintained sideways. Early lessons often involve repeated falls while learning edge control. Once stopping and turning become more consistent, riding generally feels more manageable.
How long does it take to learn snowboarding?
Many beginners learn basic sideslipping and stopping during their first lesson. Linking controlled turns may take several sessions, depending on coordination, instruction, fitness, and snow conditions. Riding confidently across varied terrain requires considerably more practice.
What snowboard is best for beginners?
A forgiving all-mountain snowboard with soft or medium-soft flex is a practical starting choice. Proper sizing and compatible equipment matter more than brand. Manufacturer weight recommendations and boot size should guide selection.
Should beginners learn snowboarding with regular or goofy stance?
Regular means riding with the left foot forward, while goofy means riding with the right foot forward. Neither provides an inherent advantage. Choose the position that feels more comfortable and allows better balance.
Can you teach yourself to snowboard?
Self-teaching is possible, but professional lessons are generally a safer and more efficient introduction. An instructor can demonstrate stopping techniques, correct mistakes, and help select suitable terrain. Independent practice becomes more productive once basic control is reliable.
Learning to snowboard takes patience, but steady progress comes from mastering the fundamentals rather than rushing onto harder slopes. Well-fitting equipment, reliable edge control, and the ability to stop and turn confidently make each session more productive. With regular practice on suitable terrain, beginners can gradually develop the balance and coordination needed to explore more of the mountain.